Hoppy Easter! Easter Recipes
Happy Easter! Looking to switch it up and try some new recipes this year? Here is a roundup of Easter recipes featuring some old favourites and some new additions:
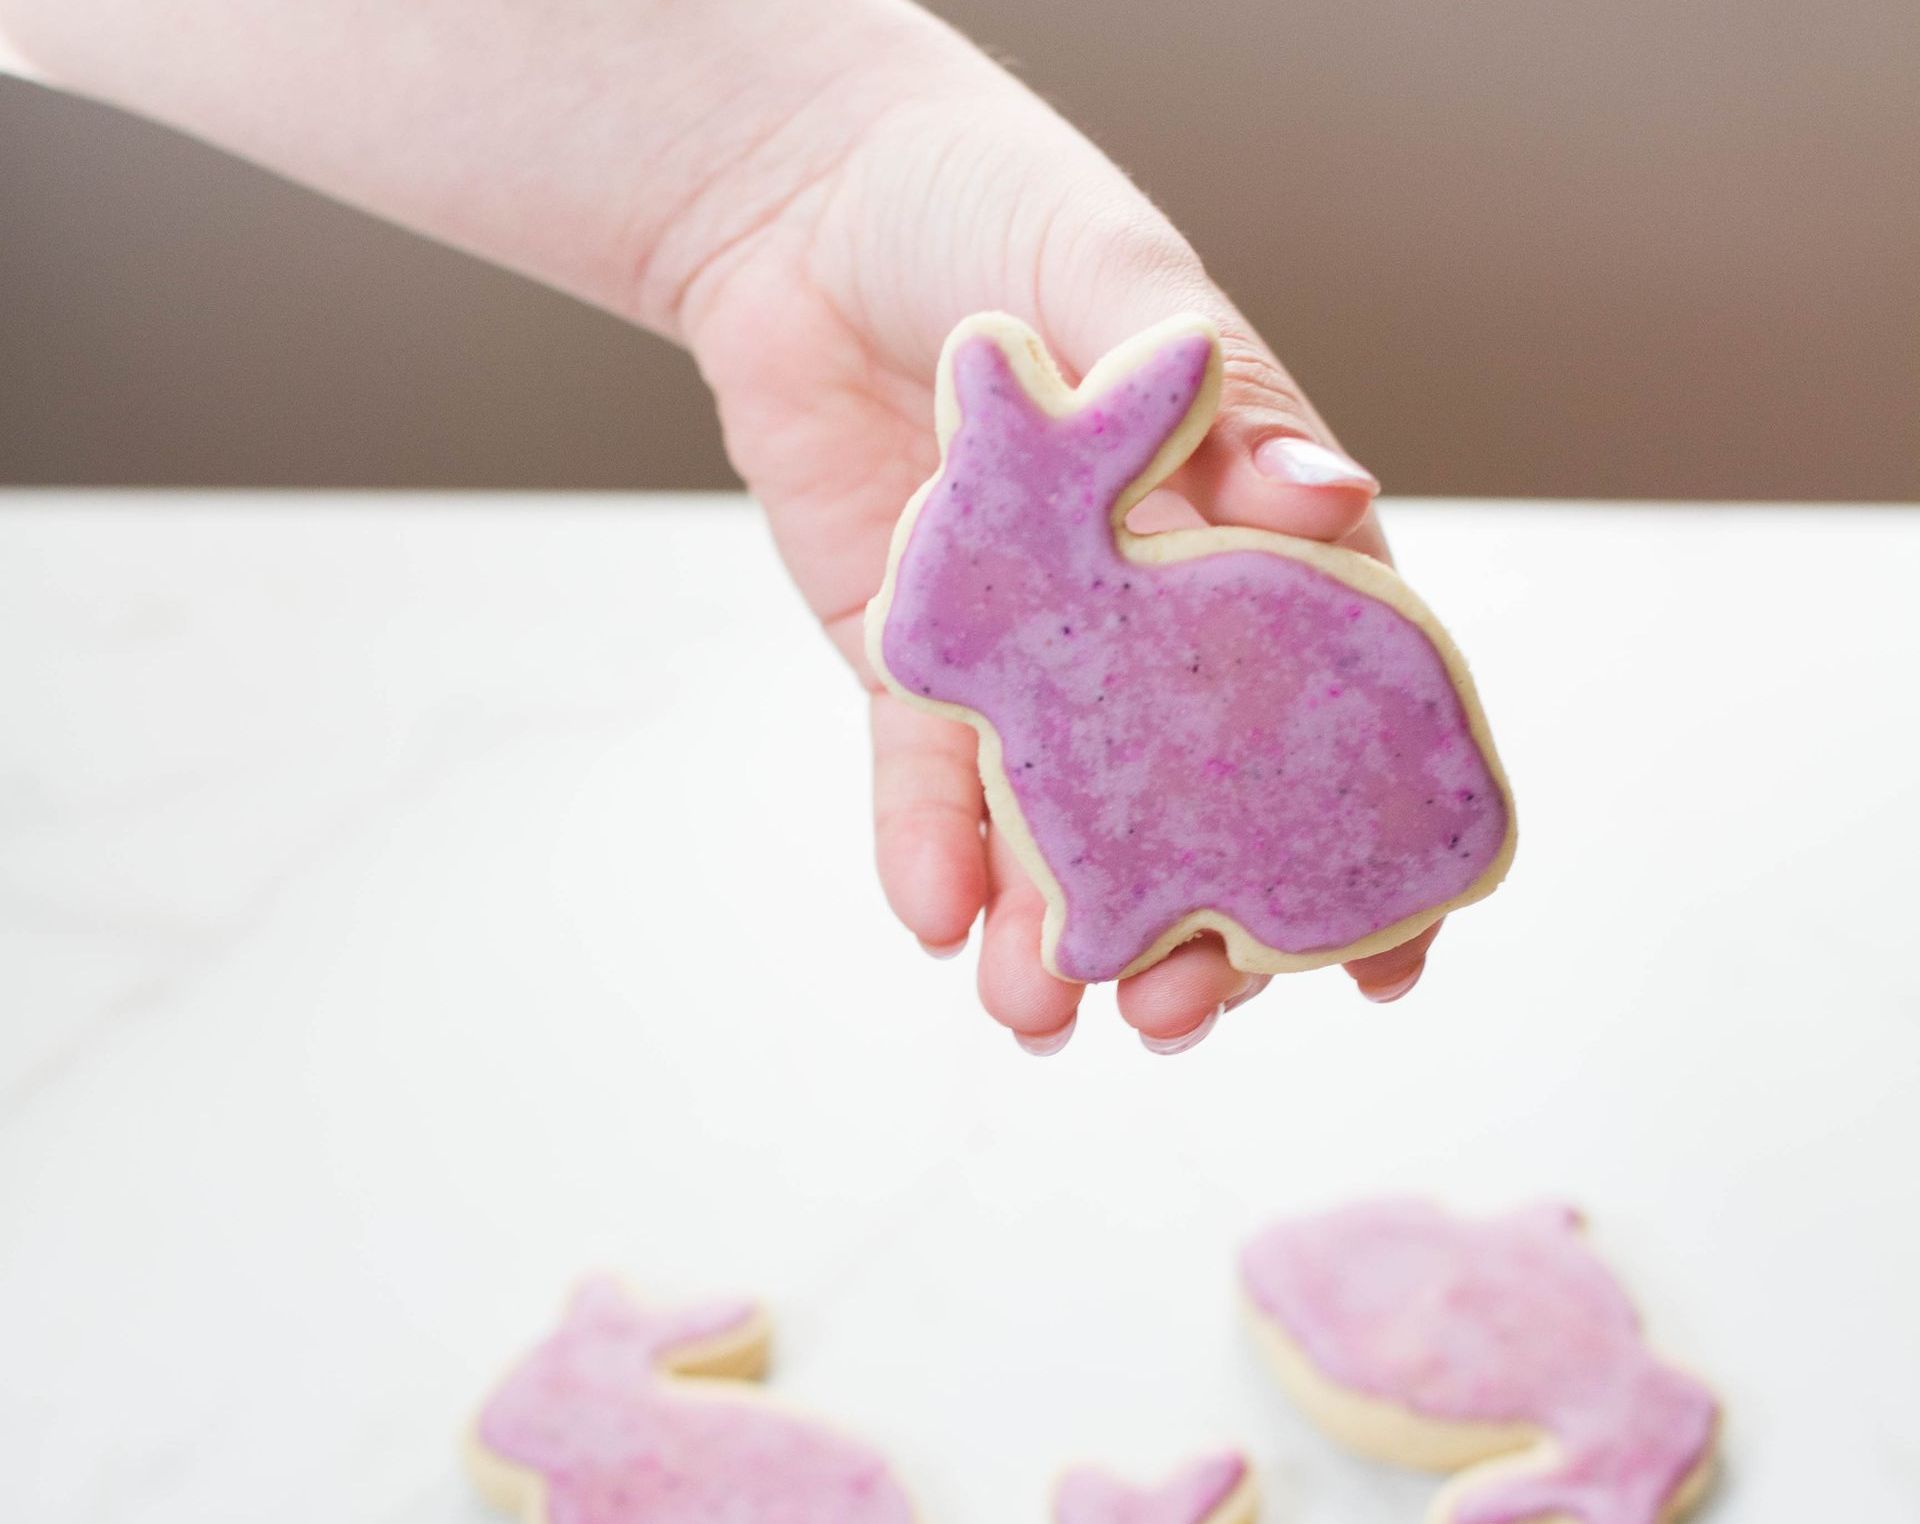
Gluten-Free Easter Sugar Cookies
These sugar cookies can be easily made with what you already have on hand and delicious enough to please gluten-free and non gluten-free eaters alike!

Ingredients
Cookies:
- 3/4 cup of salted butter, softened to room temperature but not melted (vegan substitute can be used)
- 1-1/2 cups sugar
- 2 large eggs
- 1-1/2 teaspoons of vanilla extract
- 2-3/4 cups gluten-free flour blend with binder (such as Bob's Red Mill Gluten-Free 1-to-1 Baking Flour)
- 3/4 teaspoons of baking powder
- A heaping 1/4 teaspoon of salt
Frosting:
- 1/2 cup softened vegan butter OR 1 can of coconut cream or milk
- 1/4 tsp of vanilla extract
- 1-2 cups of powdered sugar
- 1 splash of preferred milk
- 1 packet of natural food colouring
Or Berry Glaze:
- 1 cup berries fresh or frozen (you can use one kind or a medley)
- 1½ cups powdered sugar, sifted
- 1 teaspoon of vanilla paste or extract
- 1-4 tablespoons of water, cream, milk, or citrus juice
- Water or citrus juice will produce a deeper colour, while cream will produce a lighter pastel glaze!
Instructions
Cookies:
- Preheat oven to 375F and line a baking sheet with parchment paper
- Add butter and sugar to the bowl of an electric mixer or to a large bowl if using a hand-held mixer. Mix until it becomes a pale yellow colour, scraping down the sides of the bowl as you go.
- Add the eggs in one at a time, mixing until just incorporated before adding the next egg. Add vanilla, then mix until just incorporated. Scrape down the sides of the bowl again.
- In a separate bowl, stir together your gluten-free flour, baking powder, and salt. Add dry ingredients to wet ingredients in three batches, mixing on low speed until just incorporated before adding the next batch. Dough should be soft but not sticky - if sticky, place the bowl in the refrigerator for 10 minutes to let it firm up.
- Divide your dough between two sheets of saran wrap (or eco friendly beeswax wrap) then shape into flat discs, cover, and refrigerate until completely chilled.
- Unwrap dough and place onto a sheet of parchment paper. Cover with another sheet of parchment paper then roll to about 1/4” thick. Use cookie cutters to cut the dough into shapes and then carefully transfer cut outs to the prepared baking sheet. If cutouts are too soft to transfer, refrigerate or freeze parchment paper with cut outs for 5-10 minutes and try again.
- Bake cookies for 7-9 minutes or until cookies are barely golden brown around the edges. Let cookies cool on the baking sheet for 5 minutes before transferring to a wire rack to cool completely.
Frosting:
- If using coconut cream, chill the can of coconut cream (or coconut milk) in the refrigerator overnight to encourage separation of the cream and liquid. Scoop out the coconut cream or milk from the can, leaving the liquid behind.
- If using vegan butter, leave out on the counter till softened.
- Beat coconut cream or vegan butter until light and fluffy.
- Add powdered sugar and continue mixing until thick and creamy. Start with 1/3 cup of sugar, and keep testing it until it’s as sweet as you like it. You’d be surprised at how little sugar you might actually want in your icing!
- Finally, add vanilla and 1 packet of natural colouring. We're a fan of Color Garden. If you don’t have it at home, use a natural colorant like turmeric or beet juice instead (fresh or powder)!
- Spread with a spatula or spoon and top with something fun like coconut shreds, cacao nibs or granulated sugar.
Berry Glaze:
- Add your preferred berries to a small saucepan over medium heat and stir occasionally until the juice begin to release.
- Using a rubber spatula, begin pushing on the berries to help the juices release even more.
- Use a fine mesh sieve or cheesecloth on top of a bowl to pass the berries through and separate the puree from the skins.
- Allow the puree to cool completely (place in fridge to speed it up).
- Measure out 1 cup of powdered sugar, then sift into a bowl.
- Add 1-2 tbsp of puree and whisk it together to form a thick paste.
- Add 1 tbsp at a time of either water, citrus juice, heavy cream, or milk, whisking in between each addition until a pourable consistency forms.
- Apply to your cooled cookies and wait for the glaze to set. Enjoy!
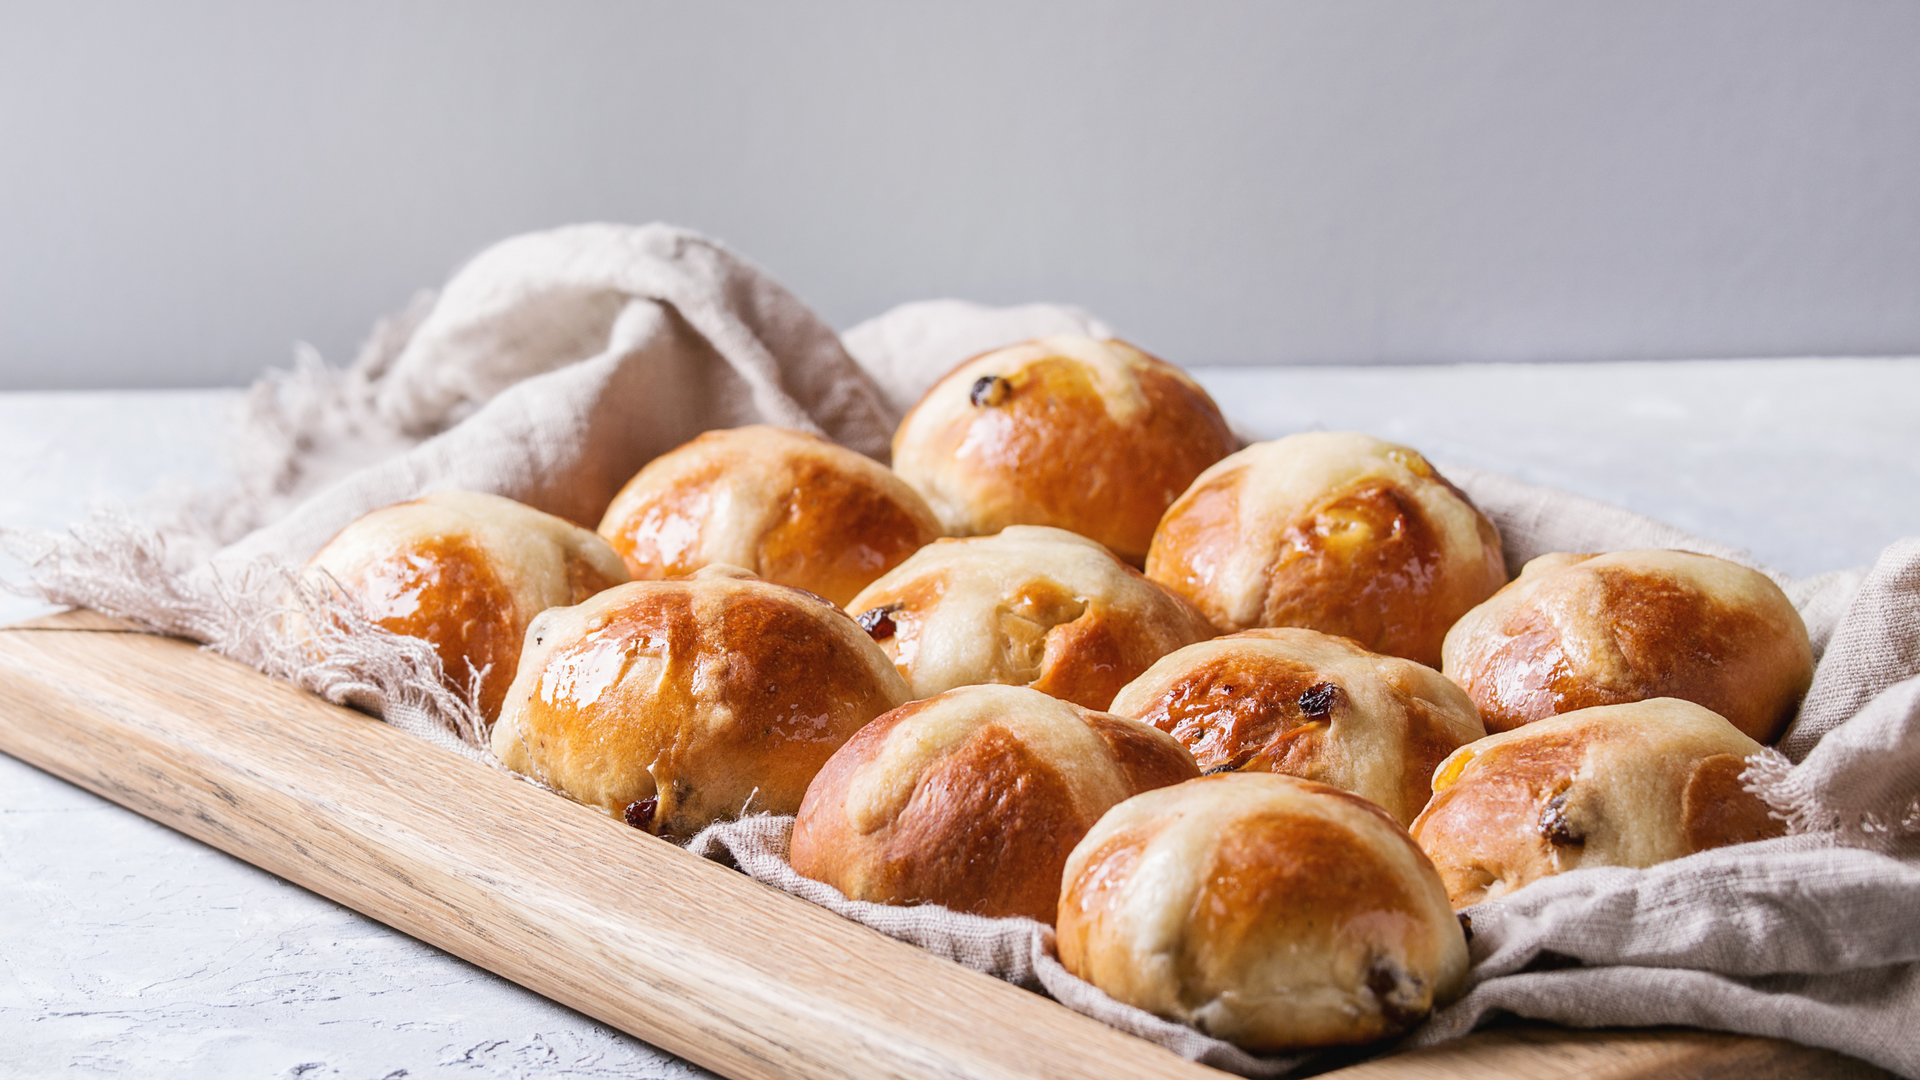
Gluten-Free Hot Cross Buns
Don't miss out on the goodness of hot cross buns just because you're gluten-free. Get ready for soft, rich, fluffy goodness! Makes about 8 buns.
Ingredients
For Buns:
- 1/2 cup raisins
- 3 tbsp whole/rough psyllium husk
- 1 cup + 1 1/2 tbsp warm water
- 2 cups tapioca starch (or arrowroot starch or cornstarch)
- 1 cup + 3tbsp millet flour, plus extra for flouring the surface
- 1/3 cup + 3 1/2 tbsp of sorghum flour (or buckwheat, white teff, or gluten free oat flour)
- 1/4 cup granulated sugar
- 1 tbsp xanthum gum
- 1 1/4 tsp salt
- 2 1/2 tsp instant yeast
- 1 tsp ground cinnamon
- 1/2 - 1 tsp ground cardamom, depending on how strong you want the flavour to be
- 1/2 cup + 1 1/2 tbsp whole milk, warmed
- 1/4 stick unsalted butter, melted
- 1 large egg, room temp
- Approx 1/2 cup of grated lemon and orange peel
For Egg Wash:
- 1 egg
- 1 tbsp whole milk
For Crosses:
- 1/3 cup + 1 tbsp plain gluten free flour blend
- 1/4 tsp xanthum gum (leave out if the GF flour blend already includes xanthum gum)
- 2 tsp sunflower oil
- 1/4 cup water
You'll also need:
- 2 1/2 tbsp favourite jam
- 1/2 tbsp water
Instructions:
- Line a large baking sheet with baking/greaseproof paper.
- In a small bowl, pour boiling hot water over the raisins until completely covered. Set aside for about 10 minutes, until the raisins have plumped up and re-hydrate.
- Drain the water, making sure to squeeze out any excess water from the sultanas/raisins. Set aside until needed.
- In a separate small bowl, whisk together the psyllium husk and water. After about 15 seconds, a gel will form. Set aside until needed.
- In a large bowl (or the bowl of a stand mixer, if using), whisk together the tapioca starch, millet flour, sorghum flour, sugar, xanthan gum, salt, yeast, cinnamon, and cardamom.
- Make a well in the middle of the dry ingredients, and add the milk, melted butter, egg and psyllium gel into it.
- Using a wooden spoon, mix well until the dough starts coming together. You can also use a stand mixer fitted with the dough hook, making sure that you scrape down the sides of the bowl to remove any dry spots of flour.
- Once it starts coming together, knead it by hand until you get a well-mixed dough with no dry patches. Squeeze the dough through your fingers, going around the bowl until you’ve incorporated all the flour. The final dough will be quite soft and sticky, but should come away from the sides of the bowl.
- Add the re-hydrated raisins and the grated peel, and gently knead them into the dough until evenly distributed.
- Transfer the dough onto a generously floured surface and give it a knead until it comes together in a ball. Be careful not to incorporate too much extra flour into the dough.
- Roll out the dough into a long log and divide it into 8 equal pieces.
- Shape each piece into a ball.
- Once shaped into buns, transfer them onto the lined baking sheet, at least 2cms apart from each other.
- Lightly cover with cling film and proof them in a warm spot until approximately doubled in volume, for about 1 hour – 1 hour 15 minutes. After proofing, the buns will touch lightly at individual points, but shouldn't be completely fused together.
- While the buns are proofing, adjust the oven rack to the middle position, place a baking tray at the bottom of the oven and pre-heat the oven to 430ºF (220ºC).
Assembling:
- For the egg wash, whisk the egg and milk together until well combined.
- For the crosses, whisk together all the cross mix ingredients (gluten free flour blend, xanthan gum, oil and water) until you get a smooth mixture. It should be runny yet viscous.
- Transfer the cross mixture into a piping bag fitted with a small round nozzle.
- Once proofed, brush the buns lightly with egg wash all over.
- Pipe the cross mixture in a line along each row of buns, then pipe in the other, perpendicular direction to create crosses.
Baking:
- Place the buns into the oven, pre-heated to 430ºF (220ºC) and pour boiling hot water into the baking tray at the bottom. Close the oven door and immediately reduce the oven temperature to 400ºF (200ºC). Steam helps them get nice and springy!
- After 10 minutes, remove the baking tray with the hot water from the oven and continue baking in a steam-free environment for a further 20-25 minutes until the buns are deep golden brown. If the buns start browning too quickly, you can cover them with aluminium foil (shiny side up) and continue baking until done.
- Once baked, slide the hot cross buns off the baking sheet and off the baking paper onto a wire cooling rack – this helps to maximise steam evaporation, to get a soft crumb that isn’t too wet, sticky or heavy.
- In a saucepan on the stove or in a microwave-safe bowl in the microwave, heat the apricot jam with water, with occasional stirring, until runny. While the buns are still hot, brush them with the runny apricot jam – this softens the crust further, as well as gives them a lovely shine and extra flavour.
- Allow to cool until warm or room temperature, and serve.
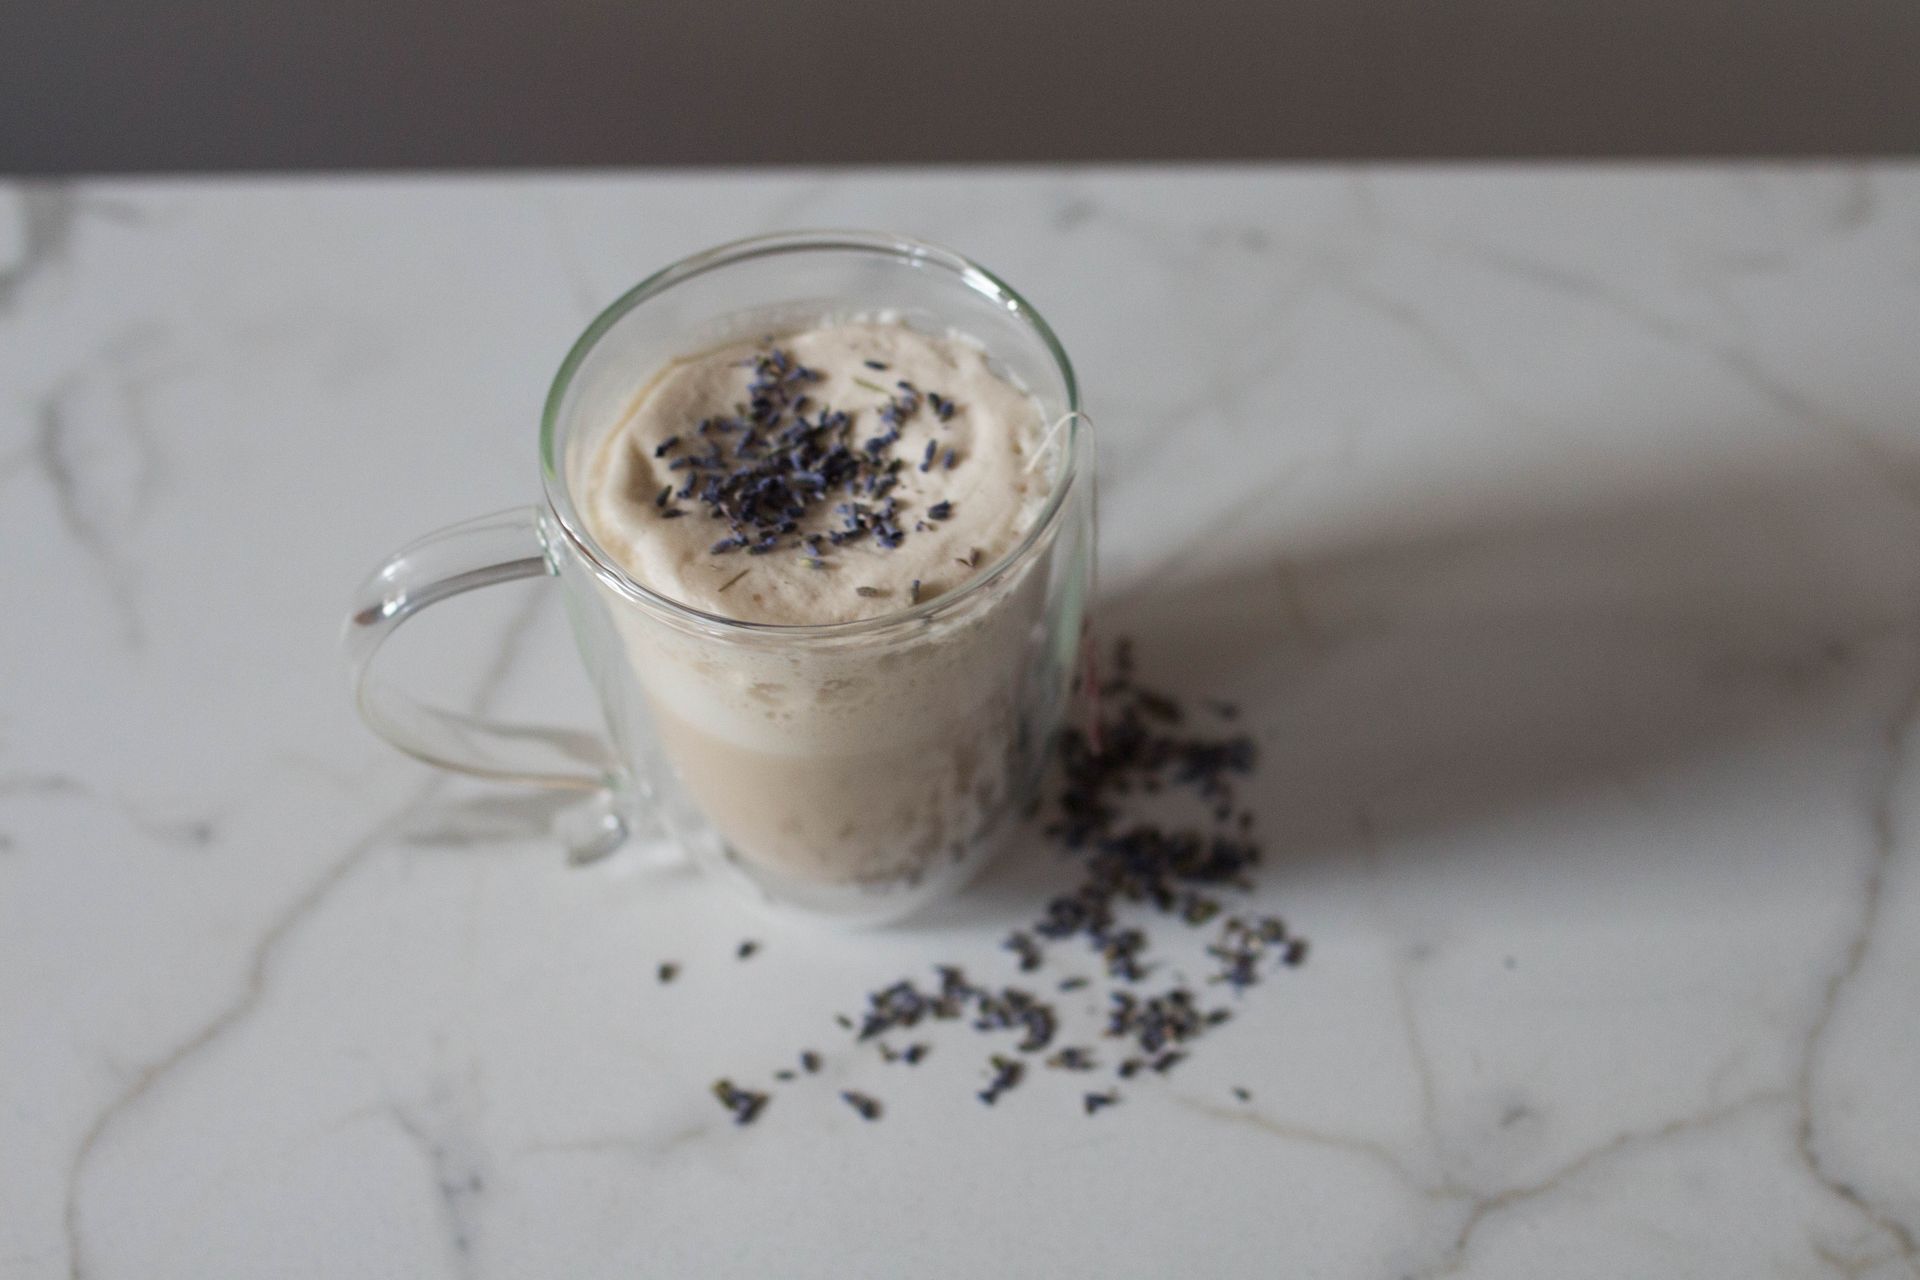
Lavender London Fog
Lavender is everywhere in drinks these days! And for good reason, its a lovely floral flavour and has lots of health benefits from calming effects to improving digestion.
Ingredients
Makes 2 Cups!
- 3 cups water
- 2 Earl Grey Tea Bags, ex. Genuine Tea or Stash
- ½ cup water
- 6 tablespoons granulated sugar of choice
- 3 tablespoons of dried lavender
- 1 cup half and half or milk of choice (if using a plant milk, barista blends froth the best!)
Directions
- Bring 3 cups water to a boil and pour evenly into 2 mugs. Add a tea bag to each mug and leave to steep so you get a strong brew. Leave tea bags in the mugs.
- To make the lavender syrup, bring ½ cup water and your sugar to a boil. Add the lavender flowers and stir. Boil until the sugar dissolves and the water is very aromatic (about 4 minutes). Strain the syrup and distribute evenly between both cups of tea.
- Froth your milk of choice and pour half the foam over each cup and serve immediately.
- If you don't have a frother or electric whisk, you can put the milk in a pot over low heat and whisk to help it froth!
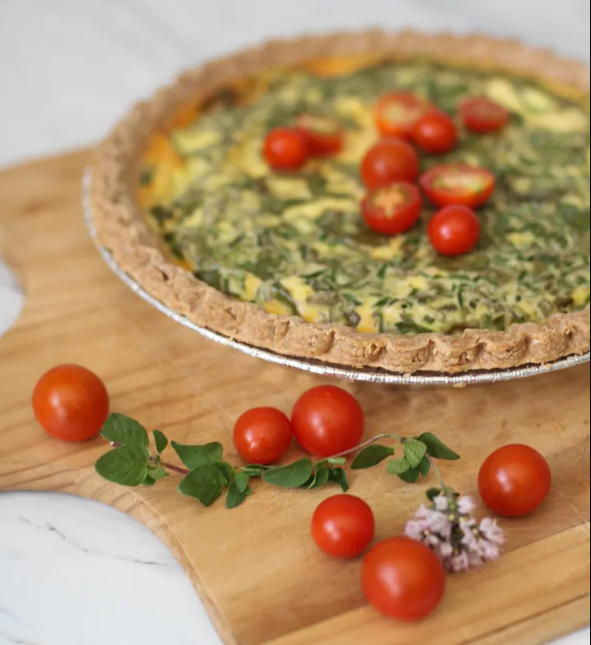
Creamy Herb Quiche
Whether for Easter breakfast, brunch or lunch, this quiche is simple & delicious! Our recipe makes two quiches or you can easily use half the recipe for a single quiche.
Ingredients
- Spelt pie crusts (or preferred gluten-free alternative)
- 12 organic eggs
- 2 cups of cream or diary free substitute
- 4 cloves of garlic
- 1 cup of fresh herbs (we used a mix of fresh basil, oregano, thyme, and chives)
- 1 1/2 tsp salt
- 1 1/2 tsp pepper
Directions
- Whisk together eggs and cream until combined.
- Mince garlic and chop your fresh herbs then add to your egg mixture.
- Next add sat and pepper and combine.
- Pour into uncooked pie shells and bake in oven at 350 degrees for 40-45 min until set.
- Serve warm or chilled. Top with freshly sliced tomatoes, a couple slices of an aged cheddar or avocado.
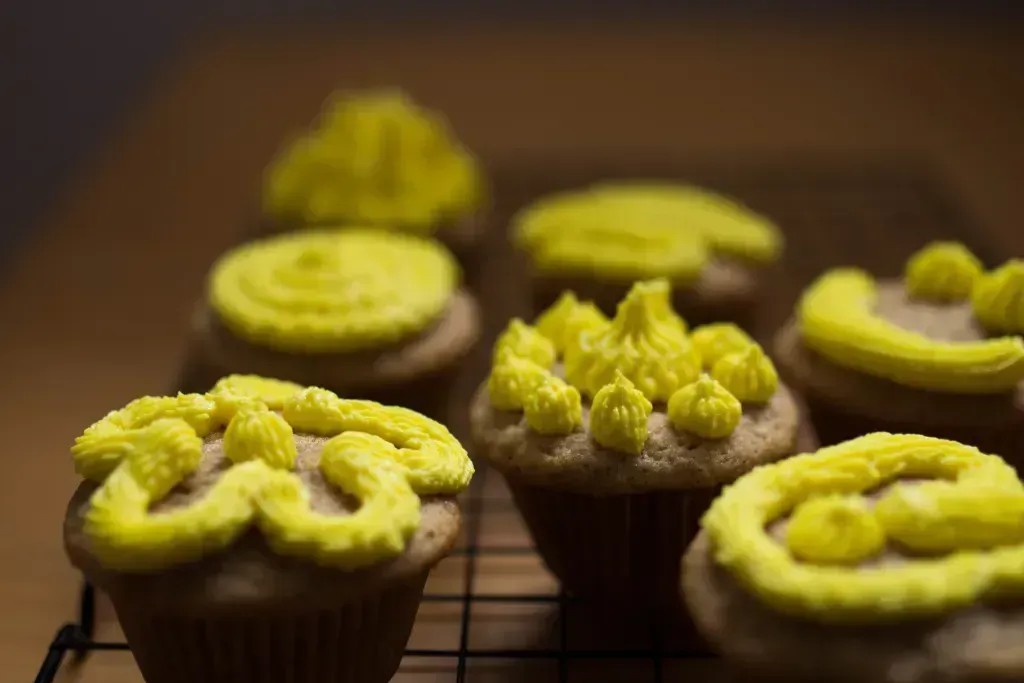
Vegan Easter Cupcakes
Whether you are vegan or do not want to use up all the eggs & butter in your fridge, this Easter dessert is perfect for you! These cupcakes can be easily made with what you already have on hand.
Ingredients:
Cupcakes:
- 1 cup oat or nut milk
- 1 tsp apple cider vinegar
- 1/2 cup avocado or olive oil
- 1 tsp vanilla extract
- 1 scant cup organic cane sugar
- 1 1/2 cups all-purpose flour, or whatever flour you have in the cupboard (for gluten free, we love Bob’s red mill all-purpose gluten free flour)
- 1 1/2 tsp baking powder
- 1/2 tsp baking soda
- 1/4 tsp salt
Frosting:
- 1/2 cup softened vegan butter OR 1 can of coconut cream or milk
- 1/4 tsp vanilla extract
- 1-2 cups powdered sugar
- 1 splash nut or oat milk
- 1 packet of natural food colouring
Directions:
Cupcakes:
- Preheat oven to 350F, lining muffin holder with 12 paper liners
- Add non-dairy milk and apple cider vinegar to a mixing bowl and let set a few minutes. Then add oil and vanilla and whisk to combine. Then add sugar and whisk to combine.
- Add dry ingredients to wet ingredients and use a whisk to blend until well incorporated. The texture should be like that of pancake batter.
- Pour batter into the paper liners. Bake on a center rack for 20-24 minutes, or until a fork inserted into the center comes out clean.
- Let cool completely on a cooling rack while preparing frosting…
Frosting:
- If using coconut cream, chill the can of coconut cream (or coconut milk) in the refrigerator overnight to encourage separation of the cream and liquid. Scoop out the coconut cream or milk from the can, leaving the liquid behind.
- If using vegan butter, leave out on the counter till softened.
- Beat coconut cream or vegan butter until light and fluffy.
- Add powdered sugar and continue mixing until thick and creamy. Start with 1/3 cup of sugar, and keep testing it until it’s as sweet as you like it. You’d be surprised at how little sugar you might actually want in your icing!
- Finally, add vanilla and 1 packet of natural colouring or use turmeric instead (fresh or powder).
- Once cooled, frost cupcakes. If you don’t have a pipe, spread with a spoon and top with something fun like coconut shreds, cacao nibs or granulated sugar. Serve immediately.
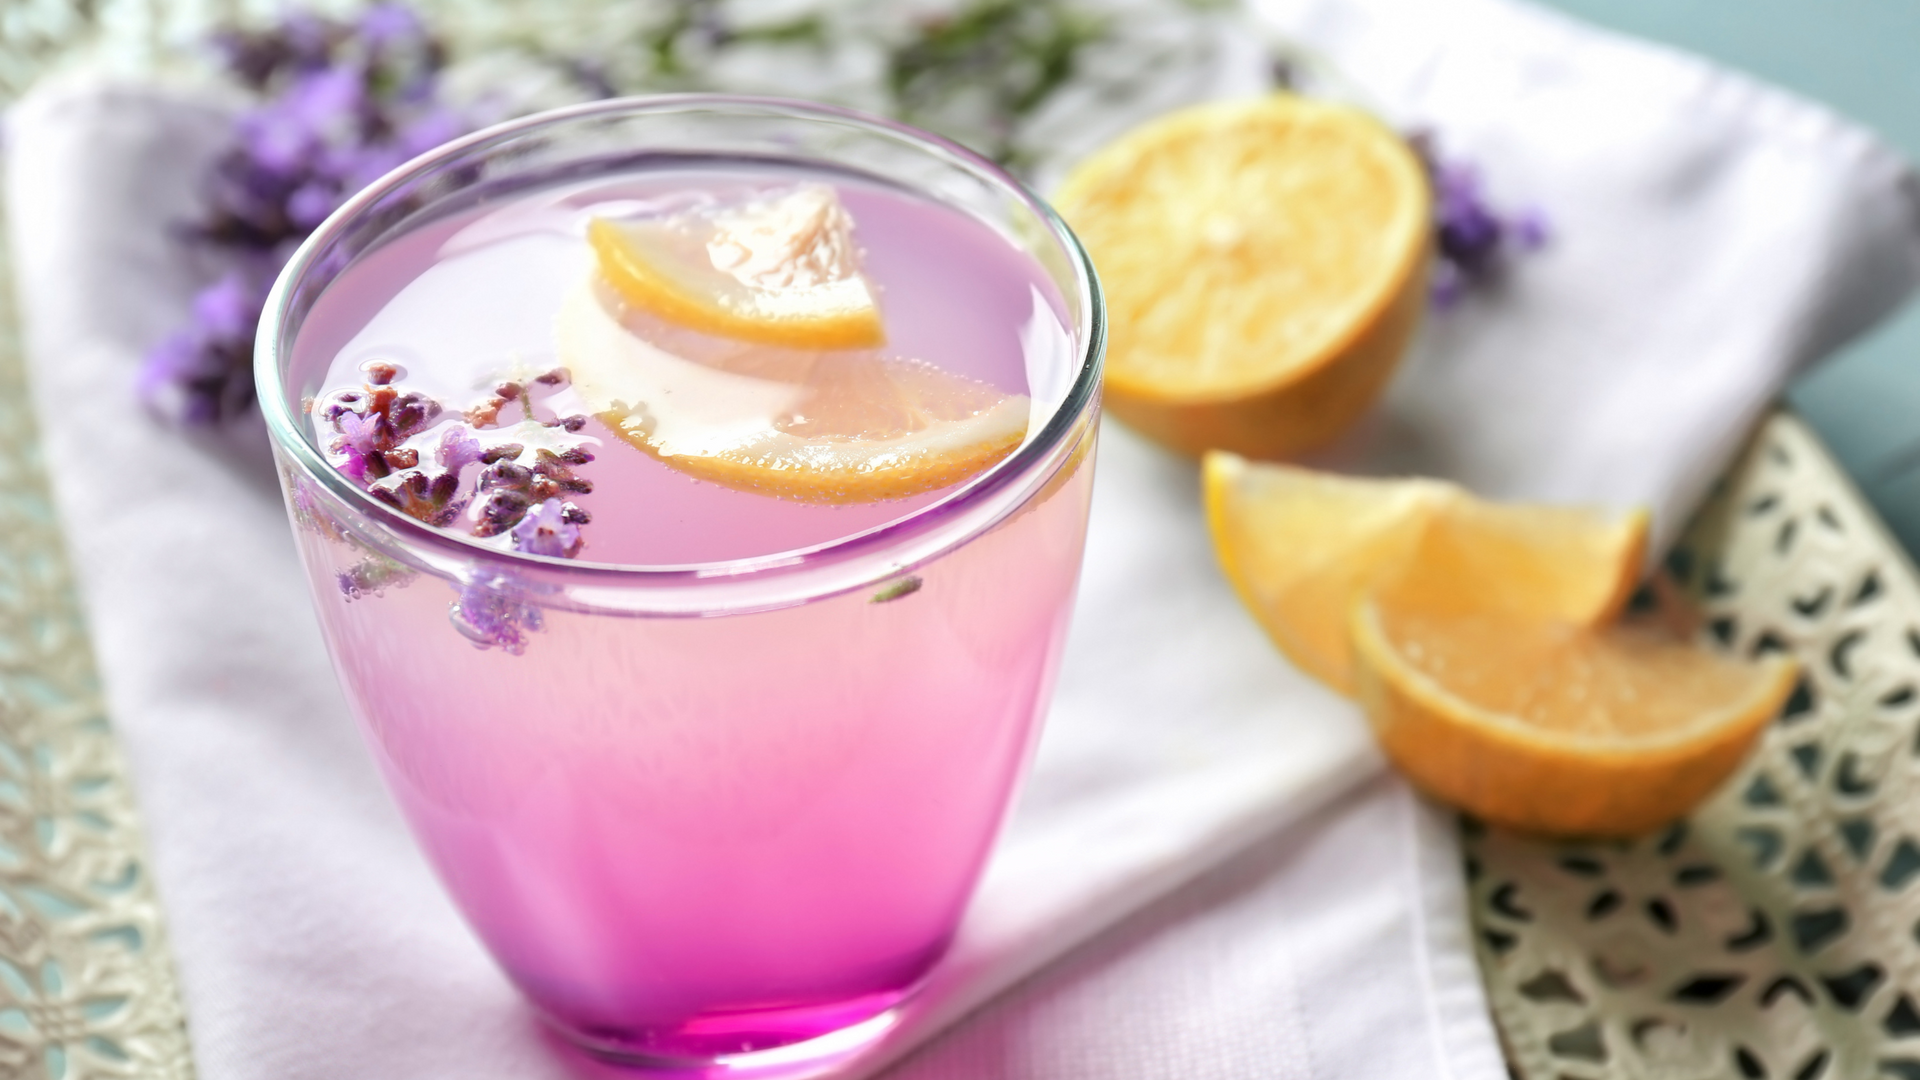
Lemon Lavender Mocktail
A lovely spring mocktail full of antioxidants and probiotics - perfect for an Easter brunch or with Easter dinner!
Ingredients:
Lavender Syrup: (makes enough for 2 mocktails)
- 1/2 cup blueberries (fresh or thawed) - if using frozen, thaw them first!
- 1/2 tsp dried lavender (food grade)
- 1 teaspoon honey
- 3 tbsp of water
Mocktail:
- 30 ml lavender syrup
- 30 ml lemon juice
- 1 cup ginger kombucha
- lavender and lemon slices for garnish
Directions:
- Add all ingredients to a saucepan over low heat. Stir gently until the blueberries soften and burst, then mash them with a fork to release the juices.
- Strain the mixture, pressing down on it with the back of a spoon to extract every nutritious drop. Place in the fridge to cool.
- Fill your glass with ice. Add the lavender syrup, lemon juice and kombucha (or alternative), then stir gently. Garnish and enjoy!
Recipe courtesy of
The Mindful Mocktail - a great resource for tons of delicious functional mocktails!
Ingredients available at Jo Anne's Place. To see store hours, click here.
Made our recipe? Tag us on social media - we'd love to share your creation with our community!